


For many people, dipping into a bag of fresh, still-squeaking cheese curds is the epitome of turophile heaven—akin to the euphoria of noshing a hot-from-the-fryer Krispy Kreme doughnut. The trouble is, as is the case for a newborn doughnut, obtaining fresh curds is a matter of fortuitous timing—once they age for even a day, they lose their precious texture. If you are one of those people awaiting your next squeaky-curd fix, you don’t have to delay your gratification any longer. Make your own fresh curds today!
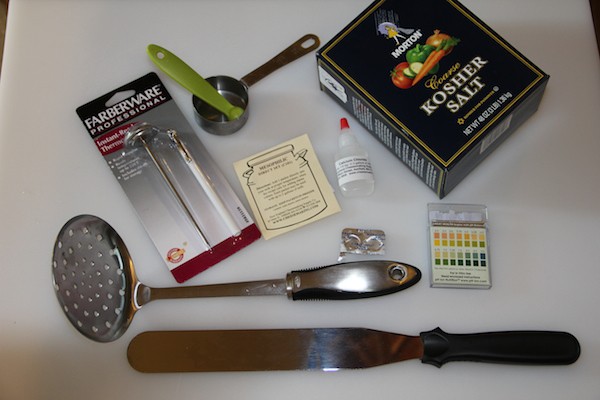
Equipment:
- 2 large stainless steel pots (approximately 3- and 4-gallon) with lids, sized so that the smaller one can be nested in the larger one
- Thermometer
- Perforated ladle or large spoon for stirring
- Long spatula or knife for cutting curds
- Stainless steel or plastic colander, of a size that can be suspended across the smaller of the two stainless steel pots
- Cutting board and knife
- 2 gallon-size ziplock bags
Ingredients:
- 2 gallons whole pasteurized cow or goat milk (not ultrapasteurized)
- 2 ounces buttermilk or 1 packet mesophilic blend from New England Cheese Supply or ⅛ teaspoon mesophilic culture blend such as MA 4000 or MM 100
- ⅜ teaspoon calcium chloride diluted in ⅛ cup cool, non-chlorinated water (optional)
- ½ tablet vegetarian rennet, crushed, or ½ teaspoon single-strength liquid rennet, dissolved in ¼ cup cool, non-chlorinated water
- 1 – 2 tablespoons kosher salt
Step 1, assemble and sterilize your equipment.
1. CLEAN EVERYTHING:
Make sure your cheesemaking equipment and area are clean and sanitary. You can use boiling water to sanitize utensils.

Step 2, heat or “ripen” the milk.
2. RIPEN THE MILK:
Pour the milk into the smaller of the two stainless steel pots. Fill the larger pot half-full with water. Set the smaller pot inside the larger pot, and set the assembly on the stovetop. Warm the milk to 90°F (32°C), add the culture. Cover, and hold at 90°F for 1 hour.
Step 3, coagulate the milk using rennet.
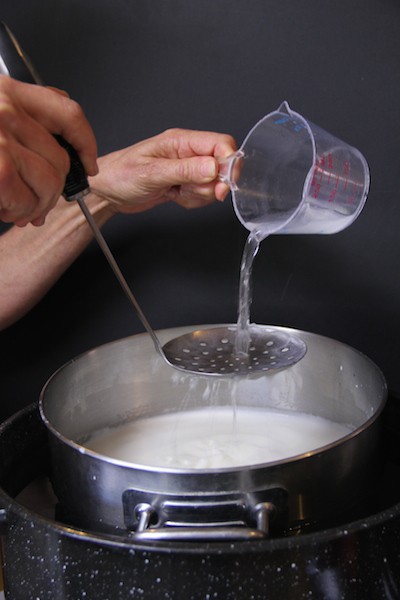
3. COAGULATION:
If using calcium chloride (it will help store-bought milk set a better curd), add it now. Pour it onto the ladle, and stir well. Add the rennet mixture by pouring it over the perforated ladle to help splatter it across the top of the milk. Stir up and down (instead of round and round) for 1 minute. Then still the movement of the milk by holding the spoon or ladle at the top of the milk. When the milk is still, cover and let set quietly until ready to cut—about 45 minutes.
Step 4, check for a clean break before cutting the curd.
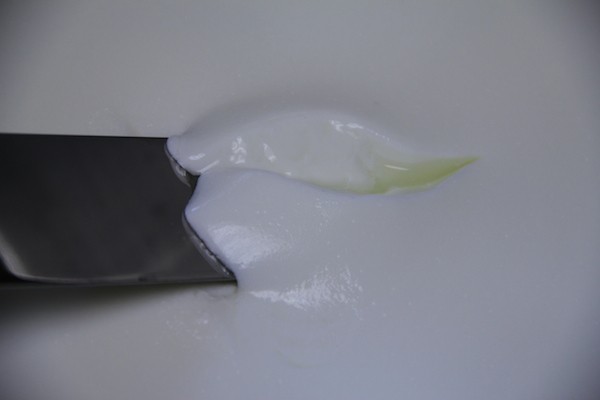
4. CUTTING THE CURD:
Check for a clean break by cutting a slit in the top of the curd with a knife, then inserting the flat wide side of the knife and lifting the curd just where the slit ends. If the curd is ready, the slit you cut will continue forward, leaving a clean-edged opening. Cut the curd into ⅜- to ½-inch (0.75–1.25 cm) pieces. Cut vertical columns into the milk first, then turn the knife at an angle and make diagonal cuts down through the top toward the sides. The pieces will not be even-sized; you have to settle for as close to even as possible. Let the cut curds set, covered, at 90°F for 5 minutes.
5. COOKING THE CURD:
With the spoon or ladle, gently stir the curds from the top down. If you see any large pieces, cut them smaller. Begin raising the temperature of the curd slowly. Your goal is to reach 100 to 102°F (38–39°C) over a 30-minute period. Hold the temperature and keep stirring for 30 to 45 minutes. The curds should feel springy and even-textured when you break one open. If you’re checking pH, the goal is to reach 6.2 to 6.10.
Step 6, drain and mold the curds.
6. DRAINING AND MOLDING:
Let the curds settle for about 5 minutes. Then gently press them to the bottom of the pot with the backs of your hands to form a solid mass. This can take a few minutes. Scoop this mass out, place it in the colander, and set the colander in the pot. It should sit well above the level of the whey. If it doesn’t, remove some of the whey. Place the thermometer into the curd, and keep it at about 98°F (37°C). Cover, and let rest for 15 minutes so the curds knit together.
Step 7, cheddar the curds.
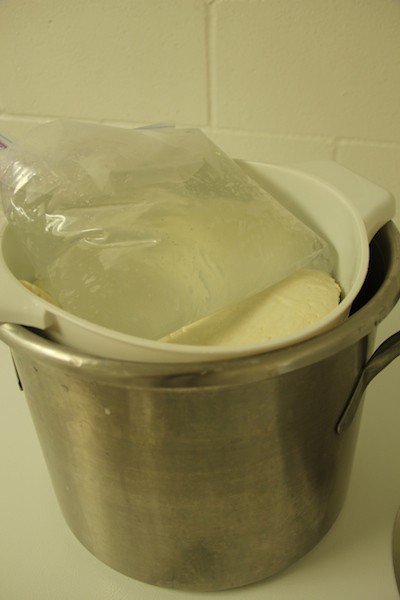
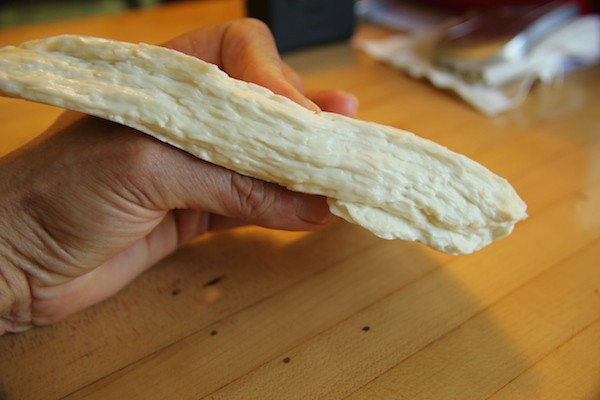
7. CHEDDARING:
Cut the slab of curd into two pieces; stack them on top of each other. Cover, and let set for 15 minutes. Restack by flipping both pieces and moving the bottom piece to the top. Double up two of the ziplock bags, and fill the inside one with about 1½ quarts of water at 98°F (37°C); place that on top of the stacked slabs. This helps get rid of whey and causes the curd to firm into the desired texture. Continue restacking as above every 15 minutes until 2 hours have passed (about eight flips). Check the texture of the curd. When you tear it, it should be like cooked chicken breast.
Step 8, slice the curds.
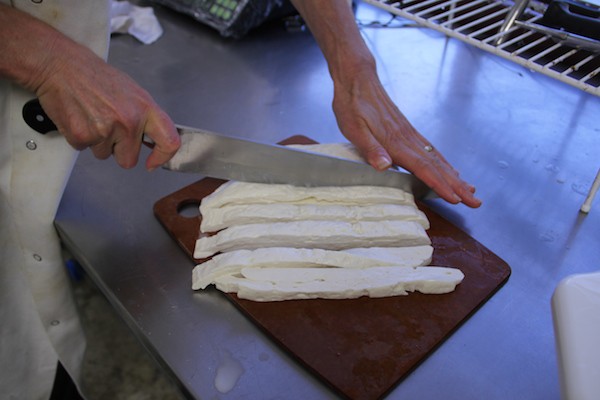
8. SLICING THE CURD:
Place the pieces of curd, which should now be flattened out to about 1 inch (2.5 cm) thick, on a cutting board and cut into strips that are 1 inch (2.5 cm) wide. Cut the strips crosswise into pieces that are 2 inches (5 cm) long.
9. SALTING:
Place the pieces of curd back in the warm colander and sprinkle with half the salt. Stir with your hands or a spoon for a few minutes. Cover and let set for 5 to 10 minutes; this allows the salt to start absorbing. It will also expel more whey; if you added all the salt at one time, much of it would be washed away. After 10 minutes add the rest of the salt and stir well.
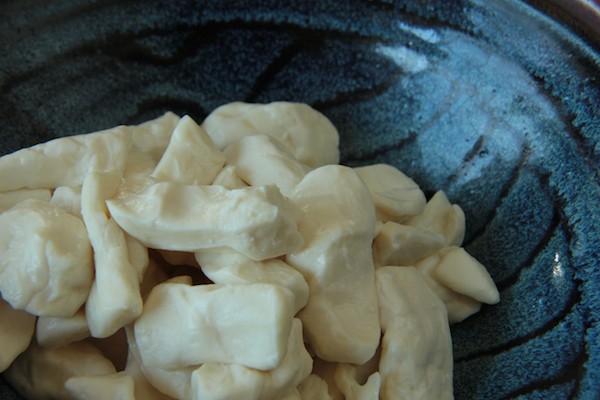
Step 10, enjoy your finished squeaky cheese curds.
10. FINISHING:
Now let the curds cool at room temperature. Stir a couple of times so the salt continues to absorb. Once you can’t see any more salt, guess what—the curds are done! Store them in a bag in the fridge. They will keep in the fridge for a couple of weeks (but lose their squeak in a day or so). You can also freeze them. If you are a fan of flavored curds, you can add spices and flavoring when you add salt.
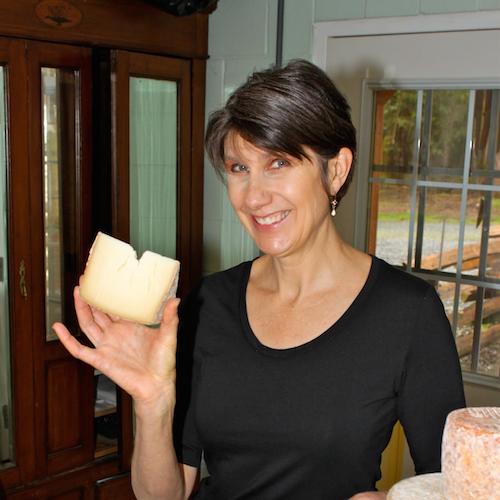
Gianaclis Caldwell
Gianaclis Caldwell is the author of Mastering Artisan Cheesemaking, among other books. She manages the goat herd and cheesemaking operations at Pholia Farm Creamery in Oregon.


After some tempering of the waves, the pebbles become more beautiful and smooth
Just made them now. Used raw milk from a local Amish farm. Came out great. This is probably the best, most well illustrated recipe I can find online.
If i have calcium chloride in a solid form, how much should i use in the 1/8 cup water? Thanks
Is it essential to use a stainless steel spoon, or can I use a large plastic perforated ladle?
Hi Linda! You can use stainless steel or plastic; you really just have to avoid aluminum or any other reactive metal.
This looks like a do-able recipe for a first-timer like me…the comments help and answer a lot of questions I had so far…
How long does the entire process take?
Depending on how fast you clean, it can take about 4-6 hours. Hope this helps!
Hi there, do you sell rennet?
Thanks
Elena
We don’t – but there are tons of great websites that do!
good day: i ‘m looking to get my poutine cheese more stretchy , so do you think it is better to get my PH around 5.2 instead of 6.2 to 6.10 ?
thank you
Great recipe! Thanks
We made a good squeaky cheese curd with raw whole milk. (Which we add to our homemade tomato basil soup. It’s wonderful.)
To save a little money the next time, we used pasteurized milk but the cheese came out more like a paneer rather than squeaky. Bought the milk from a dairy farm and made sure milk was not ultrapasteurized.
Any ideas why? Please advise
Cheese is love cheese is life. I love cheese, and you should too 😀 CheesedyCheeseCheese
Getting to the target acidity will greatly effect the stretch and squeak factor. If i do not hit my numbers i have added some citric acid to get to the target acidity (when time is an issue). Lengthening the initial ripening time can also improve acidity. I will use pH strips to measure for this. Struggled with my mozza recipe until I figured this out…
I just tried this recipe for the first time and my final product turned out more like a dry farmers cheese or crumbled feta. It doesn’t have the shininess, or gloss and consistency like seen on the last picture above, but more matte-ish look and it crumbled easily, like crumbled feta cheese. It tastes pretty good, though and while tasting it when still wet it gave a little squeak :))) The ripening took also longer for me when the milk started to finally solidify. Maybe because I used low fat cultured milk instead of buttermilk? Great recipe,though, will try again soon.
Hi there,
Am hoping to try this recipe out for my new Street-Food Poutinerie here in the UK. I am guessing by them measurements (gallons, ounces etc) you are using US measurements rather than Imperial? And is that liquid gallons? Don’t want to try it out and waste all that time/effort!
Cheers
Thank you for the recipe!
I have tried half a batch (1 gallon of milk), it yielded 450gr of cheese curds.
Will be preparing the batter and deep fry them tomorrow!!!
How much does this recipe make? My fiancee (from Montreal) wants poutine at our wedding (in Hawaii). We’re seriously considering making our own cheese curds, but we’ve got 100 guests. That’s at least 10-12 pounds of cheese curds by my calculation. How many batches of the above do we need?
I did the sqeaky cheese receive and my cheese never sqeaked. What did I do wrong?
how do you maintain the heat to not raising when you are using stovetop?
how do you maintain the heat for 1 hour to not raising esp using a stovetop?
just a recipe follower here, but what I do is either turn the oven on or another burner on that is not under the pot. it just keeps the whole area warmer and it seems to work for me.
hi, how do you maintain the heat to not rising for 1 hr when you are using stovetop?
I look forward to trying this recipe!
I just order the ingredients for making cheese curd I can’t wait to get them and see if I succeed at it
Can you tell me where I can get calcium chloride.. is that same thing u use to melt ice??can you use the ice melting salts?
You can get it from New Englans Cheese Supply. They have an online store.
This is much better way to make cheese curds in home.. Thanks for Directions..:)
How much liquid calcium chloride do you add vs powdered?
The calcium chloride in the recipe IS liquid. You always have to dilute it with water before adding it.
tsk tsk tsk, judgemental without knowledge. There’s a difference between solid Vs. Liquid. Weight Vs. volume. It’s not clear in the directions and yes, there would be a HUGE difference if one was substituted for the other. Help instead of harangue next time, hm?
All he said is it IS Liquid…….he answered your question
There is a always a better way to learn how to cook.
Would have been nice to know when to add the starter – two hours of time wasted
I’ve made this recipe 3 times now and it’s fantastic. I add chopped jalepenos and red pepper when salting and they are better than store bought curds plus they squeak! Thanks for this post!
I can’t wait to make some this weekend!
When is the buttermilk or starter added?
Right at the beginning (before you allow it to ripen for 1 hour).
I wrapped the cheese curds in cheese cloth in two layers it made the flipping process much easier. On top I used the hot water bag to press, checking water temp on each flip. This is a good recipe.
The “Find Me a Baby” video is now playing on GAC. Here is a schedule for tomorrow.