At our store in Sonoma County, California, we’ve been selling cheesemaking supplies since 2006, the year we expanded our 25-year-old business that provides wine- and beer-making equipment to consumers. Offering the tools to make cheese seemed a natural extension of our work—and it’s become really fun! All of us behind the counter have learned, hands on, about making cheese, as well as about our dairy-loving community. We’ve discovered that some of our neighbors own a goat or two and that many are avid cheesemakers. A few goat-keepers have even gone beyond the traditional range of fresh goat’s milk styles into more advanced cheesemaking. But all of them started off simply, with a classic chèvre (goat cheese) recipe—such as the one we share here.
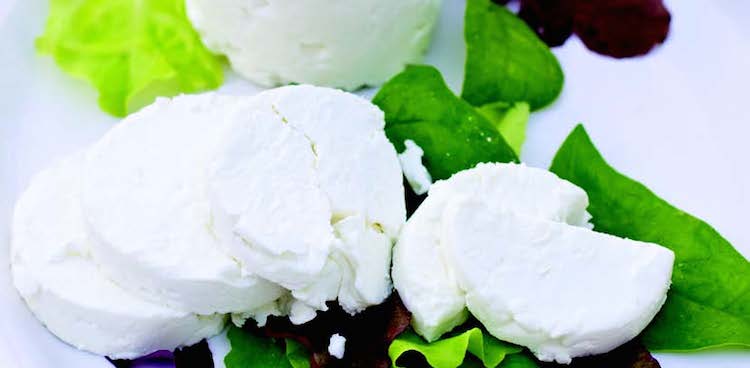
Creamy, mild, and slightly crumbly when well drained, chèvre is a fermented cheese that may be made plain or coated with dried herbs for delicate seasoning. This recipe yields four small, round cheeses with a tangy, mildly acidic finish. They’ll keep for several weeks when wrapped and stored in the refrigerator.
Creates 4 3-ounce chèvres
INGREDIENTS
- 1/2 gallon commercial pasteurized goat’s milk or fresh goat’s milk (do not use an ultrapasteurized brand)
- 1⁄8 teaspoon MA4001 or similar freeze-dried, direct-set mesophilic culture
- 1/4 teaspoon liquid calcium chloride, mixed with 1 tablespoon water
- 1⁄8 teaspoon liquid rennet, mixed with 1 tablespoon water
- Flaked or kosher salt
- Dried herbs (optional)
EQUIPMENT
- 3-quart stainless-steel pot with lid
- Perforated ladle or slotted spoon
- Dial-top cheesemaking thermometer
- 4 plastic perforated flared molds (about 4 inches tall; 2-inch diameter at the bottom, 3-inch diameter at the top)
- Cheese ripening pan (a plastic, aluminum, or stainless-steel sheet cake pan works well)
- Cheese ripening drain tray (a slotted plastic or bamboo mat atop a cake cooling rack)
Step 1
Add the milk to the pot and slowly bring it to 86°F. Remove from the heat. Sprinkle in the culture, wait 5 minutes, and then stir with 20 gentle strokes. Add the calcium chloride mixture and stir gently.
Step 2
Add the rennet mixture, stir, and cover. Let stand at about 72°F for at least 12 hours. Do not agitate or stir while the curd sets. (Let rest in a cool, lower kitchen cabinet in summer; a warm cabinet above the refrigerator in winter; or even in a closet with a light on to create more heat.)
Step 3
Ladle the curd—which should look like thickened yogurt—into molds on the draining rack inside the drain pan, leaving the whey. Drain for 24 hours at room temperature, pouring off whey from the drain pan as needed to keep the cheeses above the liquid.
Step 4
Unmold the cheeses and place them directly on the draining rack. Sprinkle lightly with salt on all sides. Let the cheeses dry for another 24 hours, turning once or twice.
Step 5
If desired, roll the cheeses in herbs before wrapping. Wrap in wax paper, then in plastic wrap or specialty cheese paper. Refrigerate and enjoy within a few weeks.


