

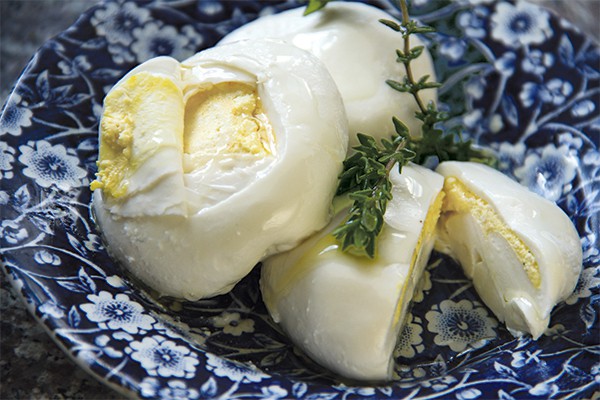
What could possibly be more delicious, more decadent than cheese stuffed with more cheese? Such is the case with the luxurious little pillows of filled mozzarella that we know as burrata. This southern Italian delight originated not from indulgence and excess, but rather frugality and inventiveness. The family of “pasta filata” (stretched curd) cheeses such as mozzarella, caciocavallo, and provolone find their ancestral roots in the heel of the boot-shaped Italian peninsula known for its herds of water buffalo. Cheesemakers who used buffalo’s milk (and other types of high-fat milk) found that it yielded two by-products ideal for the serendipitous creation of burrata: resilient and malleable curds, and whey cream.
“Whey cream,” or “whey butter,” is a glorious (and today, quite rare) product of cheesemaking with milk that is extremely high in butterfat. This conglomeration of excess fat globules can be seen floating atop golden whey at the end of the cheesemaking process. The fat, having been ripened along with the rest of the cheese milk, is delicate, flavorful, and moist. When skimmed and collected, it can be used on toast, popcorn, or, in the case of traditional burrata, mixed with tidbits of leftover pasta filata curds, stuffed into a pouch of mozzarella, and tied up with the sword-shaped leaf of the asphodel plant. Literally translated as “buttered,” burrata today is more likely to be made from cow’s milk and filled with cream, ricotta, or mascarpone, along with bits of mozzarella.
Amazingly, these cheese dumplings can be quickly made at home and served as originally intended: handled only by the artful caress of their maker and freshly tender. With just a gallon of whole milk and small amounts of butter, salt, and pepper, both the mozzarella wrapper and the fluffy ricotta filling can be whipped up within an hour. (If you use a non-homogenized creamtop gallon, you can even create the butter, though that’s a recipe for another time.)
SUPPLIES:
- Heavy-bottomed stainless steel pot, large enough to comfortably hold 3 quarts of milk
- Extra-large stainless steel pot, large enough to hold aforementioned smaller stainless steel pot surrounded by water
- Clip-on thermometer
- Large slotted spoon
- Long knife
- 2 colanders
- Cheesecloth or butter muslin, to line colanders
- Small sieve
- Plate
- Small bowl
- Clean, heavy latex gloves
- Large plate or flat, heatproof surface
- Large bowl filled with cold saltwater (made with 2 quarts cold water and 1 teaspoon salt), optional
INGREDIENTS:
MOZZARELLA
- 3 quarts whole, pasteurized milk (cow’s, goat’s, or sheep’s)
- 1½ teaspoons citric acid dissolved in 1/8 cup cold, non-chlorinated water
- 1/8 teaspoon double-strength rennet mixed into 1/8 cup cold, non-chlorinated water
RICOTTA
- 1 quart whole, pasteurized milk (cow’s, goat’s, or sheep’s)
- 1 tablespoon butter
- Salt and pepper, to taste
BURRATA
- 2 tablespoons salt
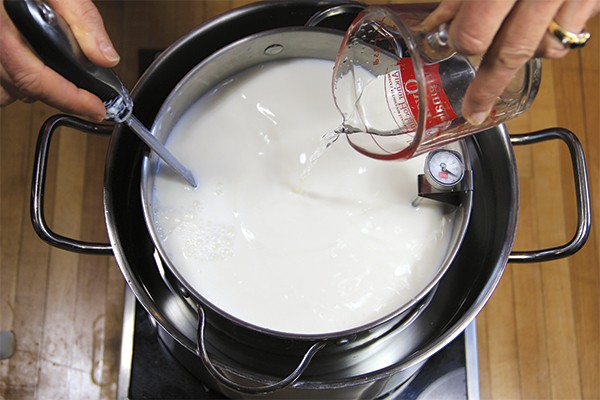
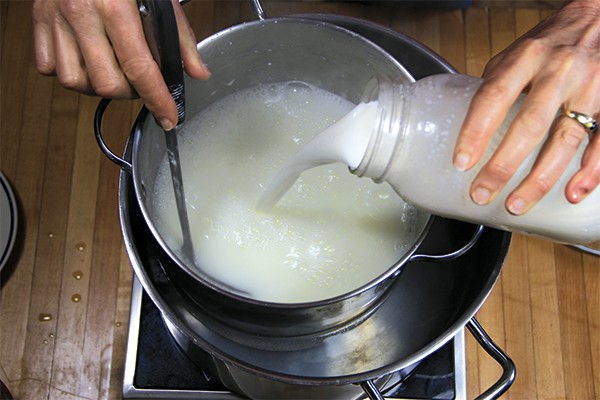
1. MOZZARELLA: Place the heavy-bottomed pot inside the extra-large stainless steel pot, and pour 3 quarts of milk into the smaller pot. Create a double boiler by adding water to the larger pot until it matches the level of the milk in the smaller pot. Stir citric acid solution into milk. Slowly heat, stirring occasionally, until milk’s temperature reaches 95°F. Turn off heat and remove pot from burner, leaving the smaller pot in the extra-large pot as the milk’s temperature rises to between 100°F and 105°F.
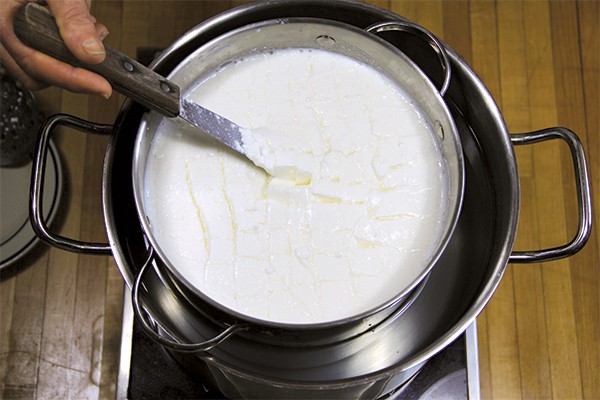
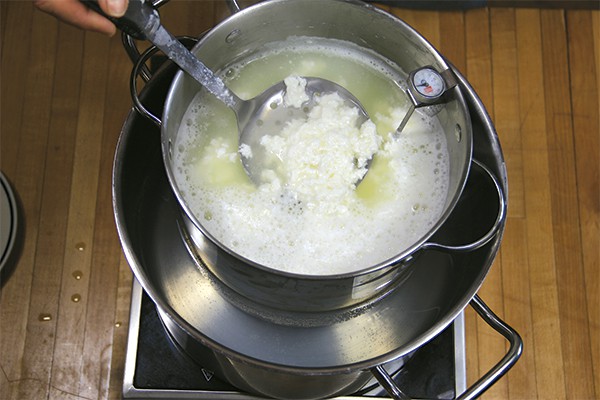
2. Stir in rennet solution using an up-and-down motion (not swirling), and leave milk mixture to set without movement for 5 minutes. After 5 minutes, the milk should have the consistency of heavy custard (check by pressing the surface with the back of your finger); if not, let set for an additional 5 minutes. Using long knife, cut coagulated milk into 3/8-inch columns, and make a few horizontal cuts at about the same interval. Let curds set for 5 minutes.

3. Reheat curds for up to 5 minutes, while gently swirling or shaking the pot. The temperature should quickly rise to between 105°F and 108°F.

4. Line two colanders with cheesecloth, and using slotted spoon, ladle curds into one of them. Reserve whey in the pot.
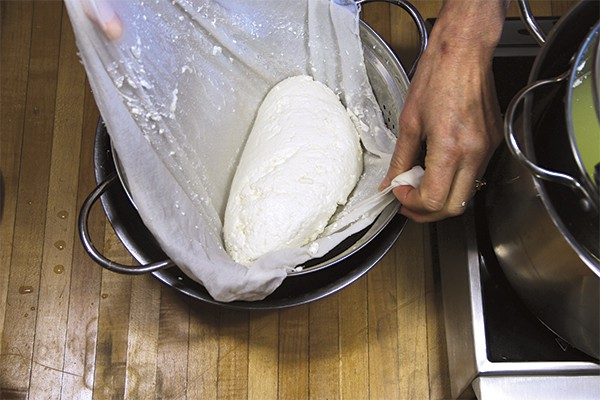
5. Cover curds with the ends of the cheesecloth or a plate and let drain, flipping curd mass inside the cloth every 5 minutes until you are finished making the ricotta filling.
6. RICOTTA: Place pot containing whey on direct heat, and stir while bringing temperature up to 175°F. Remove any large curds remaining, and add to curd mass in colander.
7. When temperature reaches 185°F, stir in 1 quart milk. It should coagulate into curds. Use sieve or slotted spoon to spoon curds into the second cheesecloth-lined colander.

8. Reserve whey. Allow ricotta curds to drain for about 3 minutes, then place in a small bowl. Stir butter into warm curds. Add salt and pepper to taste.
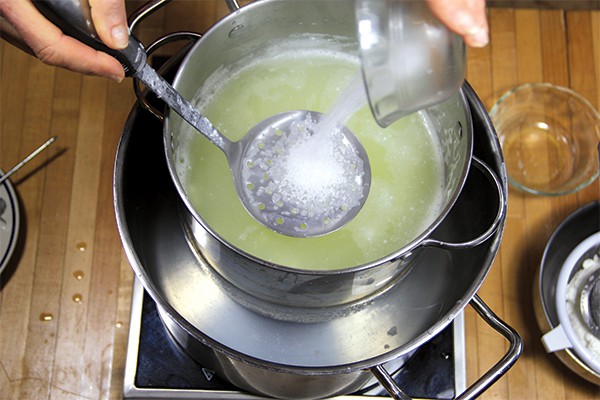
9. BURRATA: Stir 2 tablespoons of salt into whey, and verify that whey’s temperature is still 175°F. Reheat if necessary. Lower the heat, and keep whey at 175°F as you make the dumplings. Cut the mozzarella curd mass into eight pieces. Lower a piece into hot whey for 30 to 60 seconds, which should help the curd become pliable and easy to stretch.
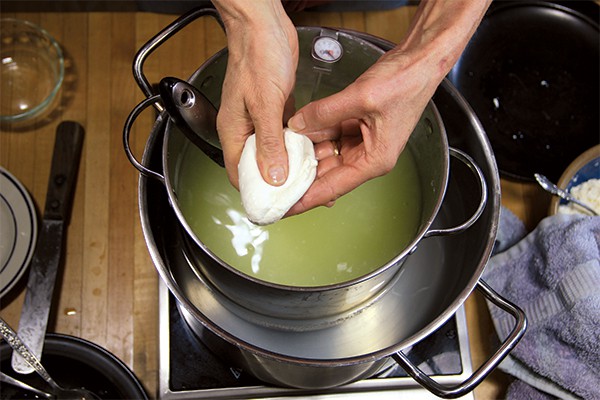
10. Check for stretch by gently pulling an end of the curd mass away from its center. (Unless your hands are as heat-resistant as our model’s, you may wish to wear gloves.) If necessary, return to whey for 30 seconds. When curd is pliable, place on a plate and fold in toward the center in a circular pattern. Reheat as needed, and repeat until curd is shiny. Then, form a flat, even patty 3 inches in diameter.

11. Place 1 tablespoon of ricotta filling at patty’s center. Bring together two opposite sides of patty, and then the other two, making a purse. Lay burrata gathered side-down onto slotted spoon. Lower into whey for 5 to 8 seconds to seal edges. Serve immediately, or float in cold saltwater to firm. Enjoy within a day for best texture.
Mozzarella Tips and Tricks
Traditional, cultured mozzarella making is an all-day process. Quick mozzarella recipes (such as the first part of this burrata recipe) have the advantage of providing near-instant gratification – but you typically need a lucky combination of added acid, great milk, and deft craftsmanship. Be patient with yourself and with the milk! Here are some tips for success:
- Measure the citric acid very carefully. If you use too little or too much, the curd will not stretch. Often the amount must be adjusted to suit the milk for the next batch.
- Use the freshest milk possible. Do not use ultrapasteurized milk. Most milk available from the grocery store will make quite decent quick mozzarella, but it must be handled very gently. Often it cannot be stirred during the fifth step but must instead be agitated by gently swirling or shaking the pot. Farm-fresh milk will usually create a much more resilient and malleable curd.
- Think of working pasta filata cheese curd as if it were a delicate pastry, rather than dough. Too much kneading and working will result in a tough, rubbery texture.
- Don’t leave the mozzarella curd in hot whey in steps 9 and 10 any longer than necessary, or you’ll overheat the fat and lose it from the curd.
Want tips on forming the burrata dumplings? Read more on Gianaclis’s website.
Gianaclis Caldwell
Gianaclis Caldwell is the author of Mastering Artisan Cheesemaking, among other books. She manages the goat herd and cheesemaking operations at Pholia Farm Creamery in Oregon.


5 thoughts on “DIY: Beautiful Homemade Burrata”