My all-time favorite foods were invented to make good ingredients last longer. Quick-spoiling milk transformed into hardier cheese or yogurt. Asparagus, cucumbers, or green beans, so fleeting in their season, submerged in brine to become pickles. And cabbage, massaged with salt, reborn as kraut or kimchi.
Every culture has its own time-honored recipes for traditional fermented fare (although it requires little more than salt and time to make). And fermentation doesn’t just capture produce at its peak—it morphs the veggies into something more nuanced, longer lasting, and often more nutritious. Fermentation doesn’t require special conditions or equipment, and homemade kimchi or sauerkraut is often cheaper than store-bought. When cabbage is sweet and abundant in late summer, I whip up a batch of sauerkraut and a batch of kimchi. Those two half-gallon jars go into the refrigerator and, scoop by scoop, add funky crunch to everything from scrambled eggs and fried rice to grilled cheese. Fermented foods tend to go well together, too; try my top combo—kimchi and sharp cheddar—in Kimchi Breakfast Quesadillas.

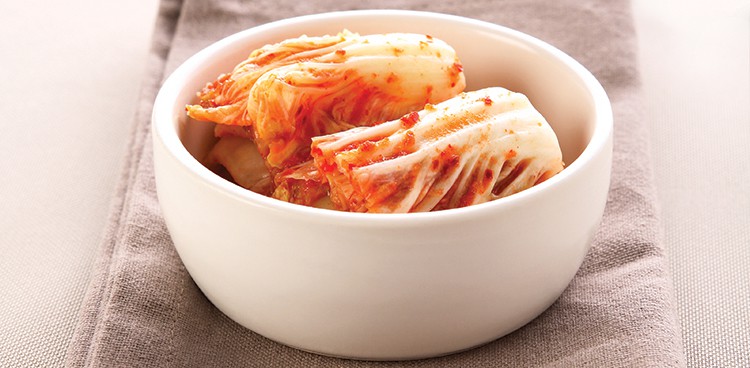
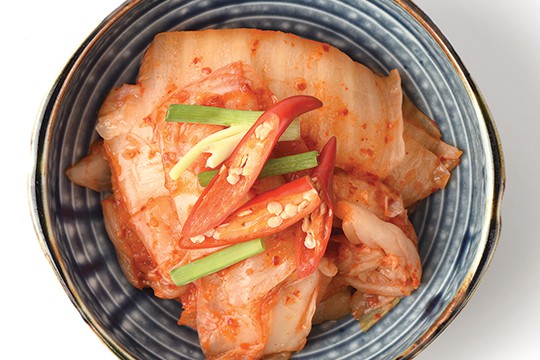
Kimchi
Ingredients
- 1 large head about 2 pounds Napa cabbage, quartered, cored, and thinly sliced
- ½ pound carrots peeled and thinly sliced or grated
- ½ pound daikon or red radishes or a combination, thinly sliced or grated
- 3 tablespoons grated fresh ginger
- 4 scallions roots removed, cut into ½-inch pieces
- 6 large cloves garlic peeled and thinly sliced
- ¼ to ½ cup diced hot peppers such as jalapeños, cherry peppers, or Hungarian wax peppers (depending on desired heat level)
- 1½ tablespoons kosher salt plus more as necessary
- 2 teaspoons fish sauce optional
Instructions
- Combine cabbage, carrots, radishes, ginger, scallions, garlic, hot peppers, and salt in a large mixing bowl. Put on clean dish gloves to protect your hands from the peppers. Squeeze and massage mixture until the vegetables release their juices.
- Scrape mixture and any liquid into a ceramic crock or similar vessel. Place a small plate over the vegetables in the crock and top with a small jar filled with water (to weigh down the plate). Lay a clean dish towel over the crock and store in a cool corner of your kitchen. Check after 24 hours. If liquid does not entirely cover the vegetables, make a saltwater solution (1 teaspoon kosher salt to 1 cup water) and use what you need to keep them submerged.
- Keep an eye on the kimchi over the next few days. Some bubbling is a good sign, and a thin layer of white scum is fine (just skim it off). After about 5 days, taste the kimchi. It should still be crunchy, but shouldn’t taste like raw cabbage or be too salty. If you like the taste and texture, stir in fish sauce, if using; transfer to a ½-gallon glass jar; cover; and store in the refrigerator. If it’s too salty or crunchy or hasn’t acquired a strong enough flavor, let it ferment another few days and taste again, repeating for up to 2 weeks total. The longer the kimchi ferments, the funkier it will become. When it’s done to your liking, stir in the fish sauce, if using; transfer to a ½-gallon glass jar; cover; and store in the refrigerator for up to 6 months.
Notes
Keep the vegetable-to-salt ratio constant at 3 pounds of vegetables to 1½ tablespoons of salt, but feel free to cut back on the cabbage and increase the radishes, carrots, ginger, or hot peppers in the mix.
No radishes? White spring turnips or sweet scarlet turnips are great alternatives.
All types of cabbage—standard red or green varieties, savoy, or bok choy—work in kimchi. Experiment!

Kimchi Breakfast Quesadillas
Ingredients
- 2 tablespoons unsalted butter divided
- 1 cup kimchi drained and roughly chopped
- 7 large eggs
- 1 tablespoon mayonnaise
- ¼ teaspoon kosher salt
- 4 10- inch flour tortillas
- ¾ cup grated aged cheddar try Tillamook Sharp Cheddar
Instructions
- Melt 1 tablespoon butter in a nonstick or cast-iron skillet over medium heat. Add kimchi. Cook, stirring constantly, until kimchi starts to dry out, about 1 minute. Whisk eggs, mayonnaise, and salt together in a medium bowl. Add egg mixture to pan and gently scramble with the kimchi, taking care not to break the eggs up too much. When eggs are cooked through, transfer to a plate.
- Wipe out pan and return to medium heat. Melt half the remaining butter and swirl to cover the pan. Add 1 tortilla and coat with butter. Spread a quarter of the scrambled eggs on 1 half of the tortilla and fold the other half over. Add the second tortilla to the pan, coat with butter, fill with eggs, and fold over.
- One at a time, open the quesadillas, sprinkle a quarter of the grated cheese over the eggs, then close the quesadillas. After 2 minutes, flip quesadillas and cook for a few minutes more before transferring to plates. Repeat with remaining tortillas and ingredients. Cut each quesadilla in half and serve hot.


